We’re down to 5ish weeks until the Little Mr arrives (please, oh, please let it only be 5 weeks and not a day more), which means I’m feeling crunched on crafting time to get things finished. You know, on top of the things that actually need finished – like the nursery. I completely admit that crafting for this munchkin is far more enjoyable than stressing about where we’re storing diapers, whether we have everything we need, etc. In the land of crafting I can pretend that everything is peaceful and calm and that this baby is going to enter the world surrounded by handmades and know he’s loved – in the real world I’m freaking out and questioning stupid things like having the hospital bags packed appropriately or if the “coming home” outfit I picked out is the right one (while simultaneously hating myself for even succumbing to the idea of a special outfit for what ends up being a 5 minute car drive home from the hospital).
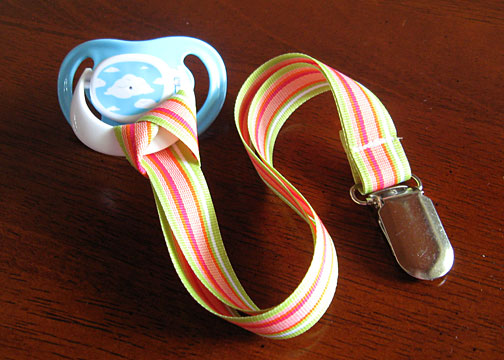
Sewing has come into play a lot lately, mostly because the things I tend to make are a lot less time-consuming than knitting is. So the project this week has ended up being DIY pacifier clips. I received one at Saturday’s shower and thought having a few more handy might be a good idea. The first one I tried didn’t turn out, but then I realized I was making the whole thing FAR more complicated than it needed to be. And complicated is no good at all. So here’s what I started with:
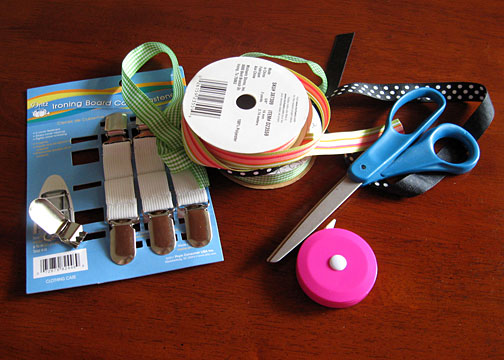
Ribbon, scissors, measuring tape, and ironing board fasteners. I went with the fasteners because there are 8 on a pack for $4 (though mine were $2.99 on sale this week) whereas the “mitten/suspender” clips were $2.99 for just 2. I’m doubting I’ll ever actually need 8 clips myself, but I know I’ll use the rest up for baby shower gifts in the future.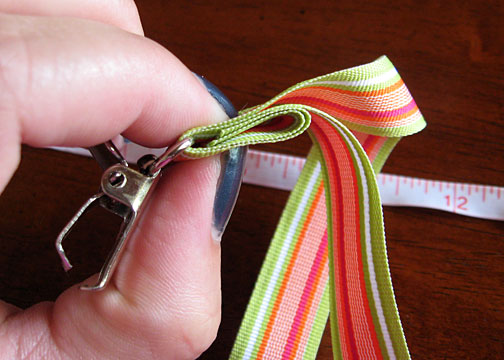
Measure your ribbon out to 24″ (61 centimeters) and cut. Cut the elastic off your ironing board clip, then fold the ribbon in half and thread the cut edges through the clip. Fold the cut edge down and sandwich it like pictured above. Make sure your back side ends up being on the backside of your clip.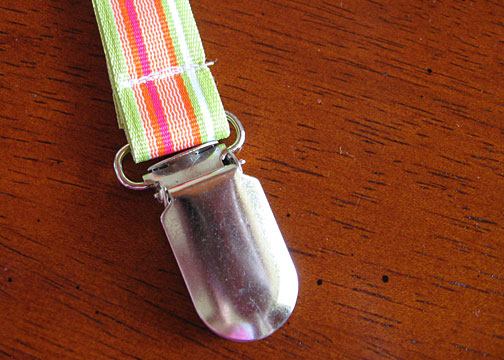
Run your sandwiched ribbon through your sewing machine a few times to secure it and call it done!